
Fancy As Twix
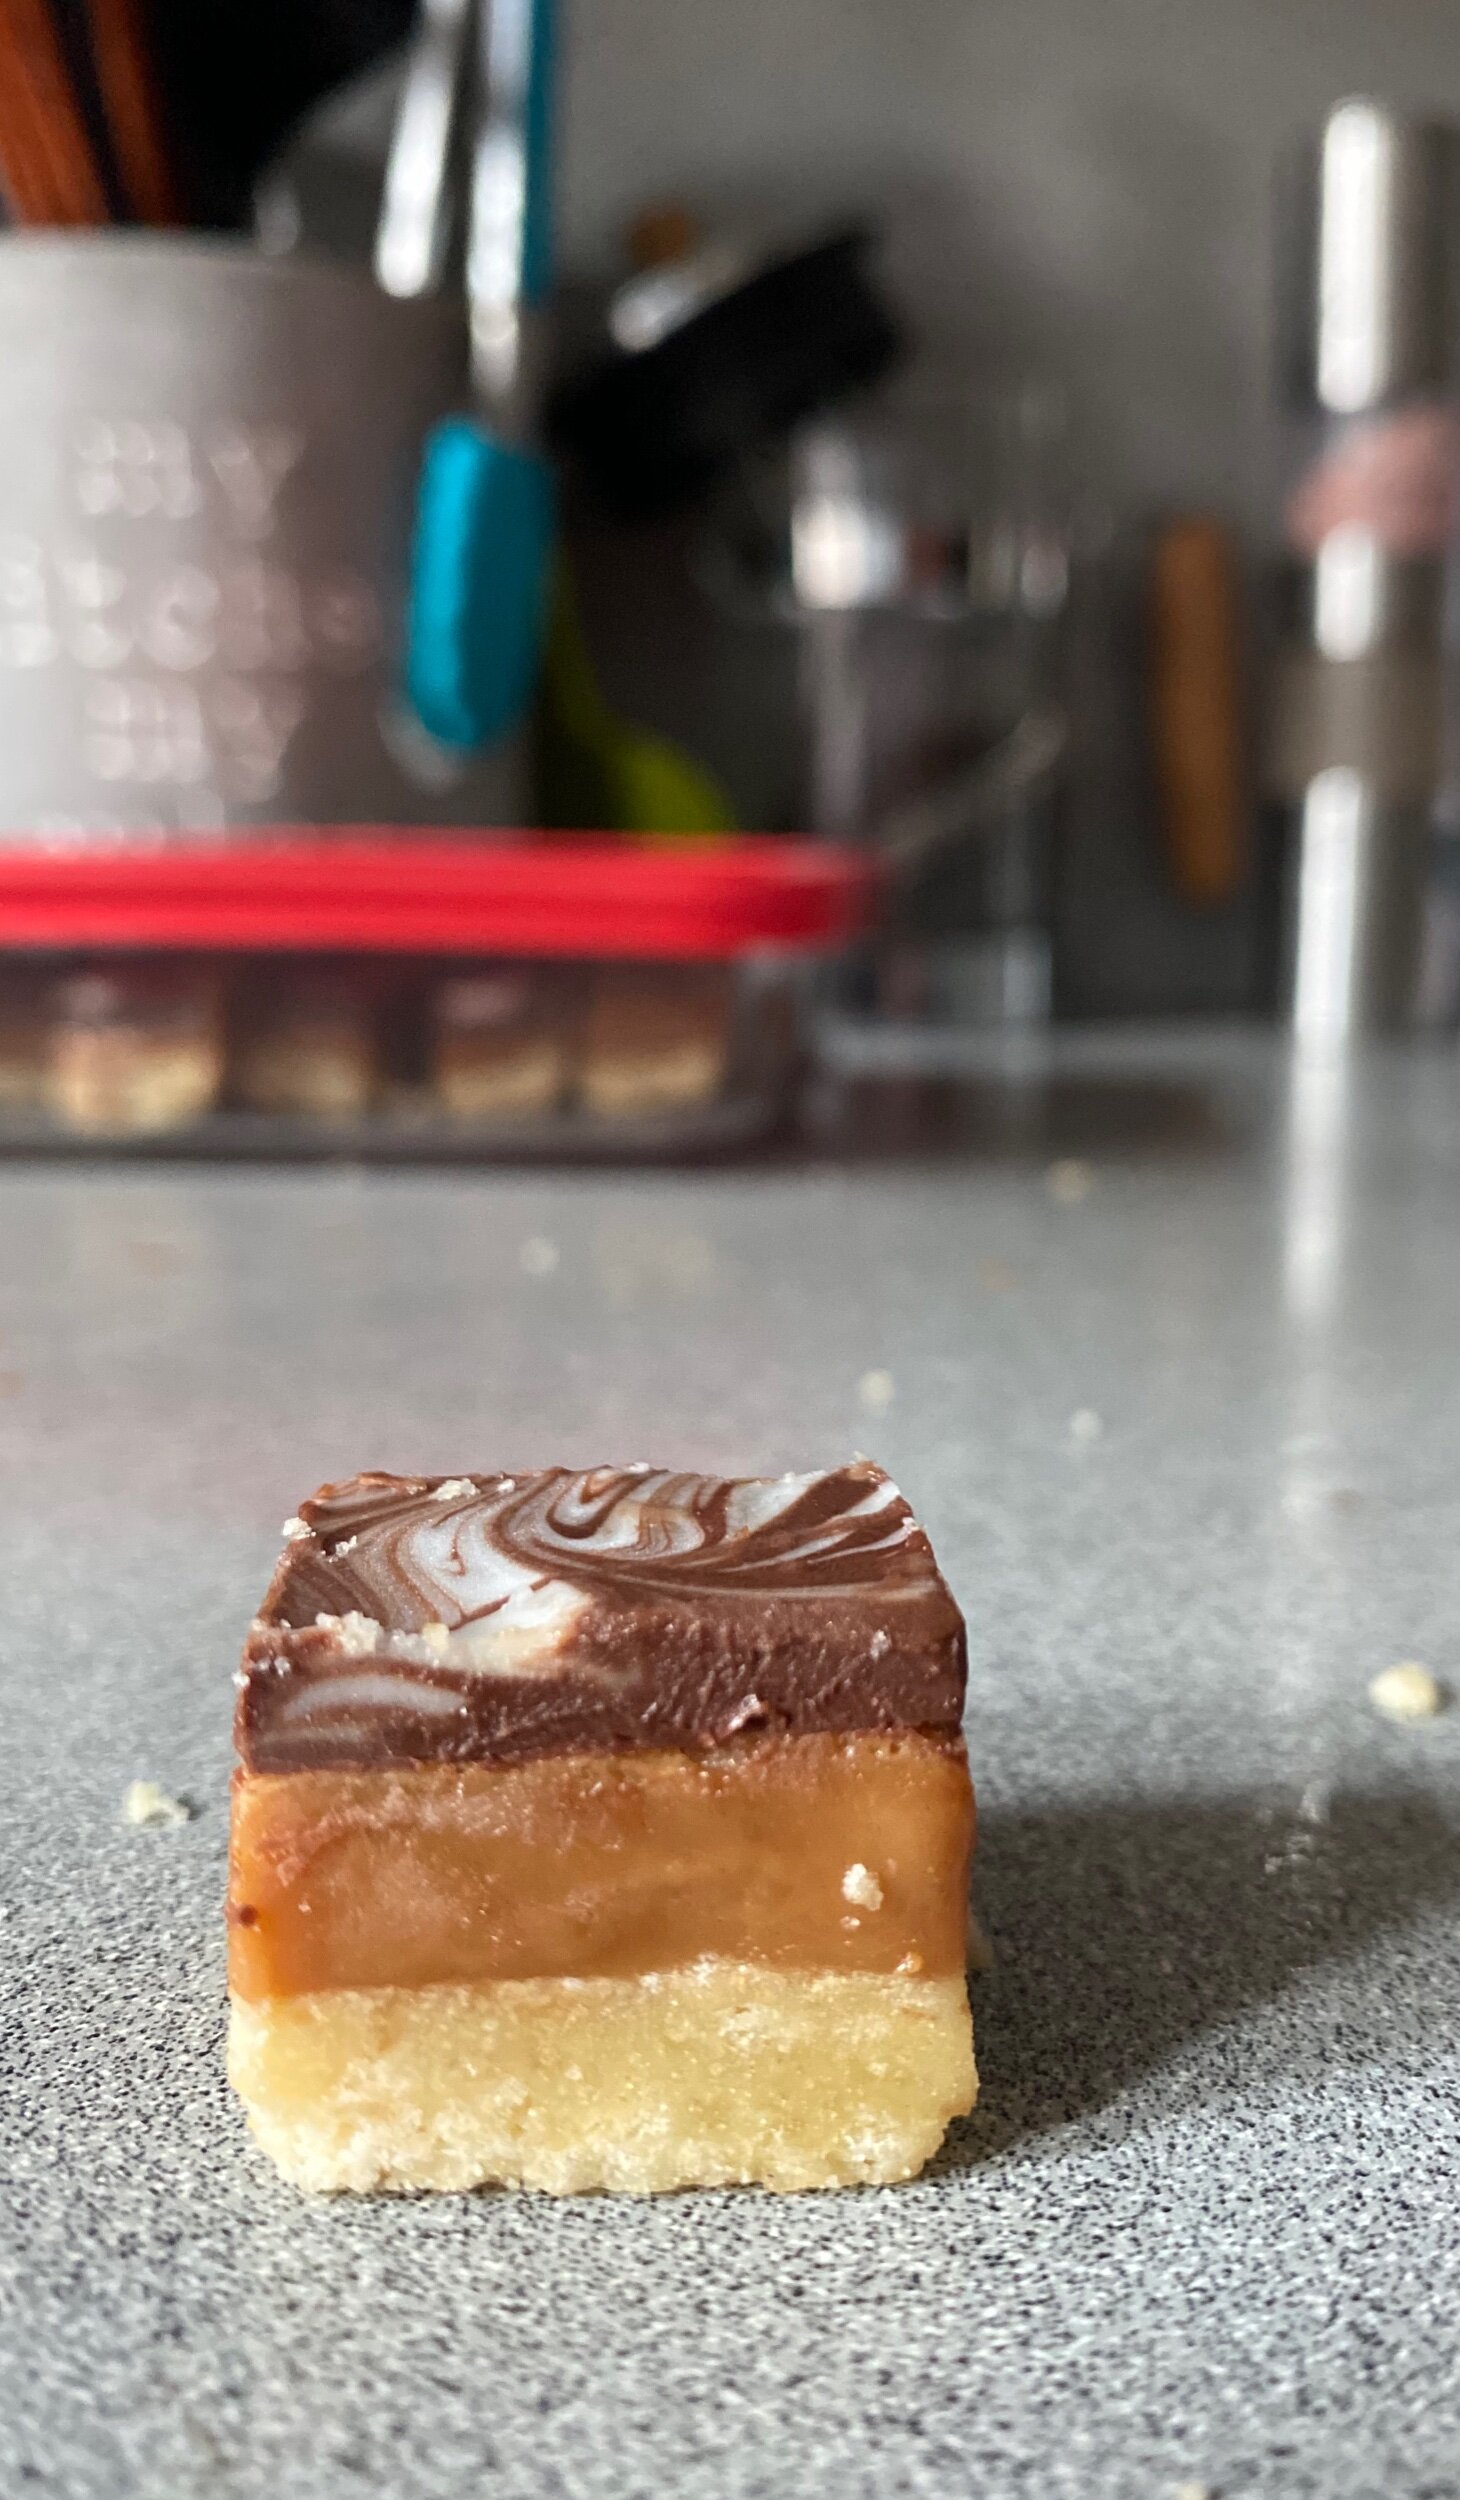
I've been playing with this recipe for a while now and it's safe to say it gets better every time so she may be updated in the future. Back home we'd call her Millionaires Shortbread or simply Caramel Squares but who are we kidding, she's just a very fancy, decadent, the definition of moreish, let's call her adult version, she's a fancy as Twix! (I'm leaving out the double s to keep it classy, for now!)This is the perfect side piece for any breakfast, lunch, dinner and/or midnight snacking! They would also make a lovely gift with the right packaging, that is if you can control yourself to not devour them all yourself! (It’s easily done!)
fancy as twix
⏲ PREP TIME: 10 minutes
⏲ BAKING TIME: 25 minutes
⏲ RESTING TIME: 3-12 hours
🍪 SERVINGS: 90 squares
EQUIPMENT
9 x 9 baking dish
sieve
mixing bowl
spatula
food weighing scale
non stick saucepan
whisk
INGREDIENTS
Shortbread Base
200 grams Self Raising Flour (Or All Purpose + 5g Baking Powder)
110 grams/ 4 oz Unsalted Butter (Kerrygold for special occasions)
50 grams Granulated Sugar
1 gram Sea Salt
Caramel Joy Middle
1 cup/ 200 grams Granulated Sugar
2 tbsp/ 28 grams Unsalted Butter (Again, Kerrygold, if you have it)
1 can/ 397 grams Sweetened Condensed Milk
1/2tsp/ 2.5g Sea Salt
Chocolate Top
200 grams Your Favourite Chocolate (I use 100g Dairymilk and 100g semi sweet chips)
2 tbsp/ 28 grams Your Favourite White Chocolate (I use Milky Way or Lindt)
1/2 tbsp/ 7g Vegetable Oil (secret weapon)
INSTRUCTIONS
Shortbread Base
1.
Preheat oven to 350°F, 180°C. Grease a square baking tin, I like to use baking paper to make sure it doesn’t stick.
2.
Sieve flour into a bowl and mix with the room temperature butter using your hands. It only takes about 2 minutes to get it together, it should look like breadcrumbs. Add the sugar and salt and mix until just combined.
3.
Put the mixture into the tin and press it in evenly. I use the back of a spoon to smooth it out. Prod it all over with a fork to make little indents.
4.
Put the tray into the oven for 10-15 minutes or until lightly baked on top. Keep an eye on it after 10, it won’t take long. I just leave it in while doing the caramel.

5.
Leave oven on when you take it out.
Caramel Layer *
The trick to perfect caramel is a good quality non stick saucepan, a decent whisk and patience!
1.
Put your sugar in your saucepan and heat on medium until sugar has dissolved completely and is turning brown. This won’t take long so keep a close eye on it and whisk it frequently to make sure it doesn’t stick.
Don’t panic if it starts to clump, it will dissolve, I promise! If you’re new to caramel and nervous, you can always set your stove low and keep a close eye on it, it will take longer but you’ll get the same result and it will be worth it for the perfect caramel! Every other time I make caramel I throw out the first batch, she’s a sticky one to master.
2.
Once the sugar is fully dissolved and turning brown take off the hob and add the butter, stirring constantly.
Then add your condensed milk, a little at a time, whisking vigurously to combine perfectly.
Put back on the hob, on low, and mix with the whisk until it's a nice light toffee colour.
Pour over the biscuit base and put back in oven for 10 minutes.
3.
Leave to set for about an hour, until caramel top has cooled and set.

Chocolate Top
1.
Melt chocolate in the microwave with 5 grams of vegetable oil. The vegetable oil will ensure that the chocolate does not crack and has a smooth finish once set.
Pour melted chocolate over caramel and use spatula to make it an even layer.

2.
This part is completely optional but also surprisingly easy and gives a professional effect that will wow your indulging guests! I highly recommend doing this!
Melt white chocolate with remaining oil and using a spoon drizzle it over the chocoalte layer whichever way your heart desires, then take a toothpick and drag it around to create a marbling effect.

3.
This is the hard part now, waiting for the chocolate to set! Leave it for about an hour or two or overnight if you are making it in advance.
Once it’s set cut into as many squares, as little or large as you like. I like to do small cubes so I don’t feel as bold and I can eat loads thinking I was. All about the tricks!! I had 15 in one day the last time I made these but I cut mine into 90 squares so I could still sleep that night!

4.
This is the most important part, enjoy! I recommend pairing them with a cup of tea or coffee!
Bácáil Sona!! (Happy baking!) 👩🏻🍳
NOTES
* EASY CARAMEL ALTERNATIVE! Feel free to just throw your sugar, butter, condensed milk and salt into your saucepan and stir continuously for a few minutes until you get a luscious toffee brown colour you like.