
Vanilla Dream Cake

I thought it was about time I posted another party cake and this cake screams party! I actually feel a bit sugar sick writing this because I just finished licking the remnants of its existence off its cake board and maybe over indulged on some leftover skittles, maybe! It’s that primary school birthday party too much sugar sick so it’s still a mixture of pure joy. I should probably stop talking about being sick while I’m trying to sell you on a cake…
Anyway, if you want a fun and absolutely delicious birthday or celebratory cake then look no further. If you want a boring and absolutely delicious cake you can also keep reading and just omit the pink dye, sprinkles, chocolate morsels and hidden sweeties! I prefer the bells and whistles but the joy of baking is that it’s all about personal preference so do you!
Also, I can’t tell a lie, this cake does take a while to do and this particular one for this post took me four and a half hours, between preparation, resting, baking and clean up time. I may have had multiple cups of tea and a particular scrambled eggs and tea sit down break to watch some of a certain debate that doesn’t bare mentioning in detail… BUT, to finally get to my point, it is worth the effort so let’s get to the important stuff, the actual recipe!
VANILLA DREAM CAKE
recipe

Super moist, super flavourful, super fun, super cake!
⏲ PREP TIME: 1 hour
⏲ BAKING TIME: 40 minutes
⏲ RESTING TIME: 1 hour
🍰 SERVINGS: 18 slices
EQUIPMENT
stand mixer with paddle attachment (electric/hand whisk)
two 9inch cake tins
parchment/baking paper
spatula
food weighing scale
whisk
mixing bowl
measuring spoons
offset spatula
cake scraper
rotating cake stand
cake board (if using)
INGREDIENTS
Vanilla Cake
240 grams/ 2 cups all purpose flour
10 grams/ 2 tsp baking powder
2.5 grams 1/2 tsp baking soda
400 grams caster sugar
15 mls/ 1 tbsp vanilla extract (good quality)
2 eggs
2 egg yolks
225 grams/ 8oz/ 2 sticks unsalted butter
112 grams (1 packet of powder) white chocolate pudding mix
240 mls/ 1 cup whole milk
40 grams large multicolour sprinkles
4 drops pink food dye
112 grams vanilla confetti cake flavored morsels
111 grams skittles (sweets/candy of choice)
Vanilla Buttercream Frosting
112 grams/ 4oz/ 1 stick unsalted butter
112 grams/ 4oz/ 1 stick vegetable shortening
500 grams powdered sugar (icing sugar)
5 grams/ 1 tsp vanilla extract
30 mls/ 2 tbsp heavy cream
INSTRUCTIONS
1.
Preheat oven to 350°F, 180°C. Grease two 9 inch cake tins.

2.
Cream butter in your stand mixer with a paddle attachment until pale and creamy, about 3-4 minutes. You can also use an electric hand mixer.
3.
Add sugar to butter and cream for about 5-10 minutes until the sugar is mixed through and it looks light and fluffy.

4.
Add eggs and yolks, one at a time, until combined.

5.
Add vanilla extract. I like to use a really good quality vanilla extract when the treats are for a special occasion and/or if vanilla is one of the main attributes of the dessert.
I like this one by McCormicks. Trader Joe’s do a great bourbon one too.

6.
In a separate bowl, using a hand whisk, mix the white chocolate pudding mix with a cup/240mls of whole milk.
Again, use a good quality pudding mix, I always use Godiva.
Alternatively, for convenience, you can just add the pudding powder to your flour mix.

7.
Add pudding mix to stand mixer and combine on medium until just mixed. Alternatively here you can just add the milk and omit the pudding mix but I think it adds to the overall taste and consistency.
8.
Sieve all purpose flour and cornstarch twice into a large bowl (this just makes the flour works the same as cake flour)Add baking powder, soda and salt and mix with a whisk. Add to the stand mixer, 1/3 at a time, beating on medium until combined fully. This won’t take long.

9.
Mix through your morsels.
For this cake I used vanilla confetti cake flavour but you could use white chocolate ones or leave them out completely.

10.
At this point you can put your cake mix directly into the cake tins if you’re leaving them plain.
I poured half into a bowl and mixed through sprinkles. I also weighed out my mix to make sure it would be completely even. Feel free to eyeball it, I love to weigh things!

11.
I mixed about 6 drops of pink dye through the other half of the dough and put them both into their cake tins.

12.
Put your cakes in the oven for 30-45 minutes until a cocktail stick or knife comes out clean and the cakes are pulling away from the edge. Mine took 40 minutes.
13.
Let the cakes cool in the cake tins before putting them out on a wire tray and before frosting them.
14.
Use a circle cookie cutter to cut out the center of both cakes. Keep one and slice it in half. This will work as a lid once the sweets are in.

Buttercream Frosting
1.
Add butter and vegetable shortening to stand mixer and beat with a paddle attachment.
I like to do a mix of butter and shortening in my buttercream frosting because it yields a stiffer mix and the shortening holds up better with heat and travel, etc. It also tastes delicious!
2.
Add the powdered sugar a bit at a time and beat on medium until thick and creamy.
3.
Add vanilla and heavy cream and mix through. You can also add food colouring at this point if you want to jazz it up even more.
Cake Assembly
1.
Put one of your cake layers onto a cake base on a rotating cake stand and say that fast three times! Using an offset spatula add buttercream in a nice thick layer, making sure to keep the middle clean.
2.
Add the second cake layer and then add your skittles or choice of sweets to the center and place the cut out piece of cake on top making sure it’s level with your top cake layer.

3.
Using your offset spatula and a cake scraper do a thin crumb layer and put your cake in the fridge for 30 minutes to let it set.

4.
Add the rest of your buttercream and smooth it out with your scraper.
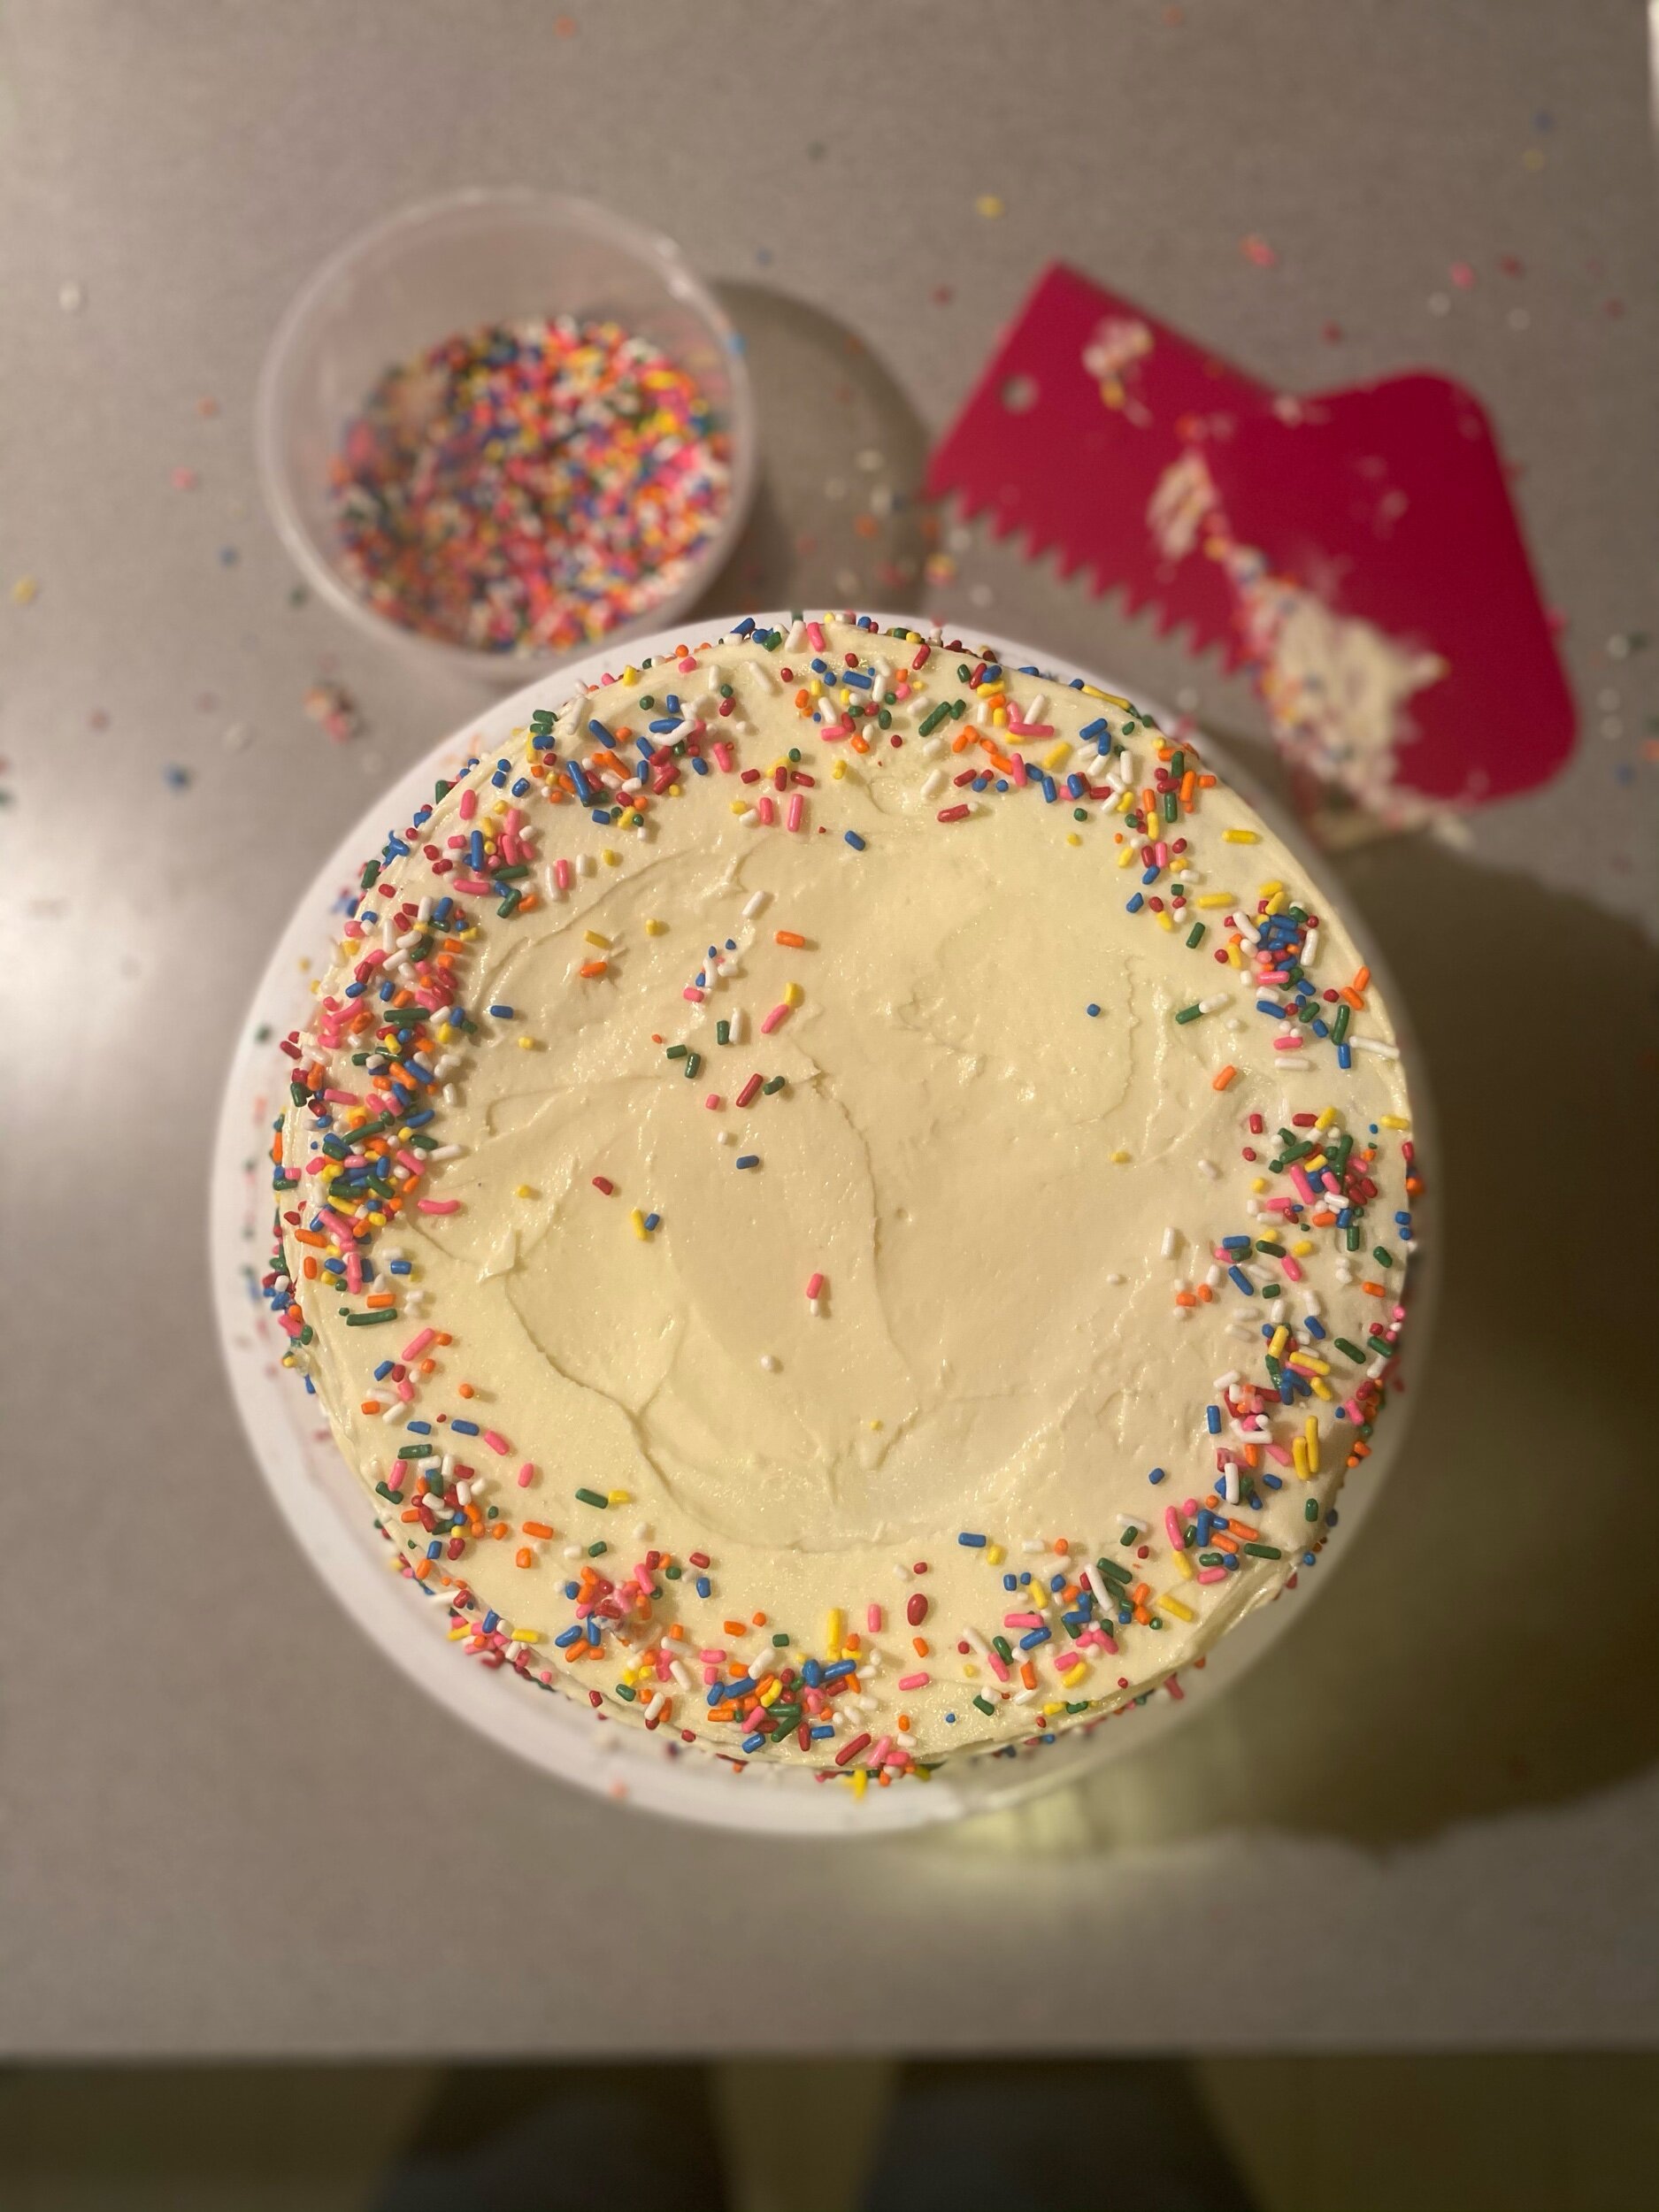
I like to add more sprinkles at this point because I think it screams celebration and it looks amazing. It also covers a multitude of sins.
I do exactly what it says on the tin and just sprinkle the sprinkles on top, along the edges and throw some against the sides and spin the stand until enough sticks for it to look good. You can keep doing this until the whole cake is covered or leave it sparce, both will look amazing.
5.
Add writing at this point or extra piping on the cake surface. I put the cake back into the fridge for 30 minutes and then kept it covered at room temperature until I needed it the next day. Cake should be good for a few days.
